DIY: Cupcake Liner Wreath
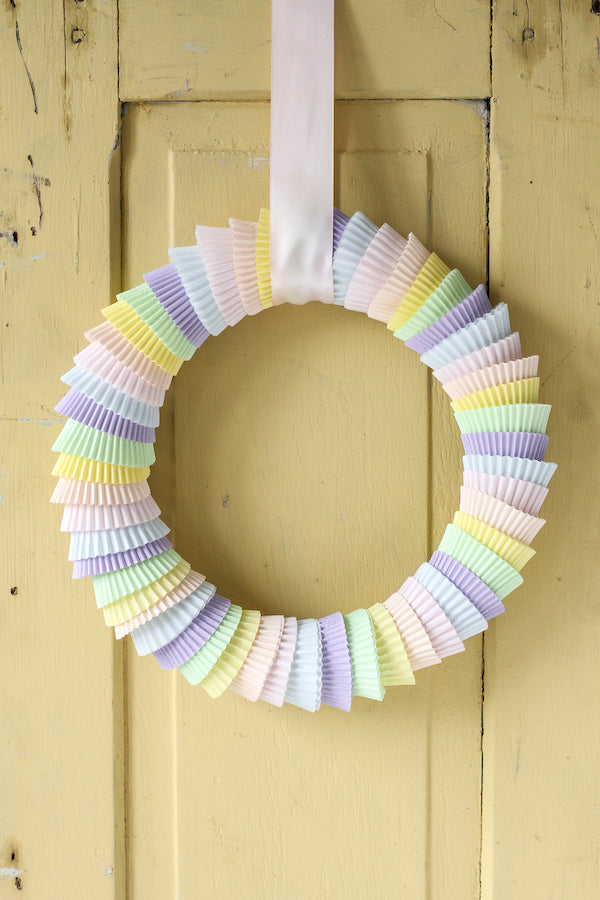
A quick craft from our COO, Libbie Summers. Holiday wreath? Sure, ANY holiday with the right colored cupcake liners. I love this for a fun, fast and festive wreath that the littles can help make.
Cupcake Liner Wreath
makes 1 (12-inch) wreath
What you need:
120 paper cupcake liners in whatever colors you like (I used pastels for this wreath)
1 (12-inch) styrofoam wreath form
scissors
straight pins
Ribbon to hang

What to do:
Step 1: Prepare the cupcake liners.
Working with two liners stacked together at a time (doubling them up makes them more sturdy when pinning to the styrofoam), make a cut down one side just to the bottom and cut the bottom of the liners out (the circle part at the bottom of a cupcake!). Continue with all of the liners. You should have 60 sets and 120 colored circles (I’ll show you what to do with those later).

Step 2: Attach the liners to the styrofoam wreath form.
Start anywhere on your wreath (this will become your “top” and be covered with ribbon when you hang it). Wrap one set of liners around the wreath and secure in the back with straight pins. You could also glue the cupcake liners with stick glue, but I find them secured better with straight pins AND you can take the pins out and reuse the wreath). Continue adding the liners (alternating colors) by overlapping the previous liners and securing in the back with straight pins. Work your way around the wreath until it is completely covered. Note: The last liner is a bit of a bear to add, but don’t worry, it will be covered up with a ribbon! 😉

Step 3: Hang your wreath!
Cut a piece of ribbon the length you need for hanging over your door or wherever you think would be fun to hang! I hung mine over the side of our mid-century liquor cart from the rum decanter!

PRO TIP: Remember all those circles you cut out? They make the BEST confetti!!!!

Published


